Set up VPN Containers
VPN Containers allow you to run multiple isolated browser sessions, each with its own IP address. Perfect for managing multiple accounts or e-commerce stores.
Available on: Windows, MacOS, Ubuntu (v4.0.1+)
Before configuring VPN Containers, please complete the app download and login.

Manage different e-commerce stores from different exit IPs, while keeping other traffic on local internet for normal browsing.
- Default: No VPN, use local internet for daily work
- Container A Browser: Connect to Los Angeles to manage Amazon.com
- Container B Browser: Connect to Singapore to manage Shopee
- Container C Browser: Connect to Paris to manage Amazon.fr
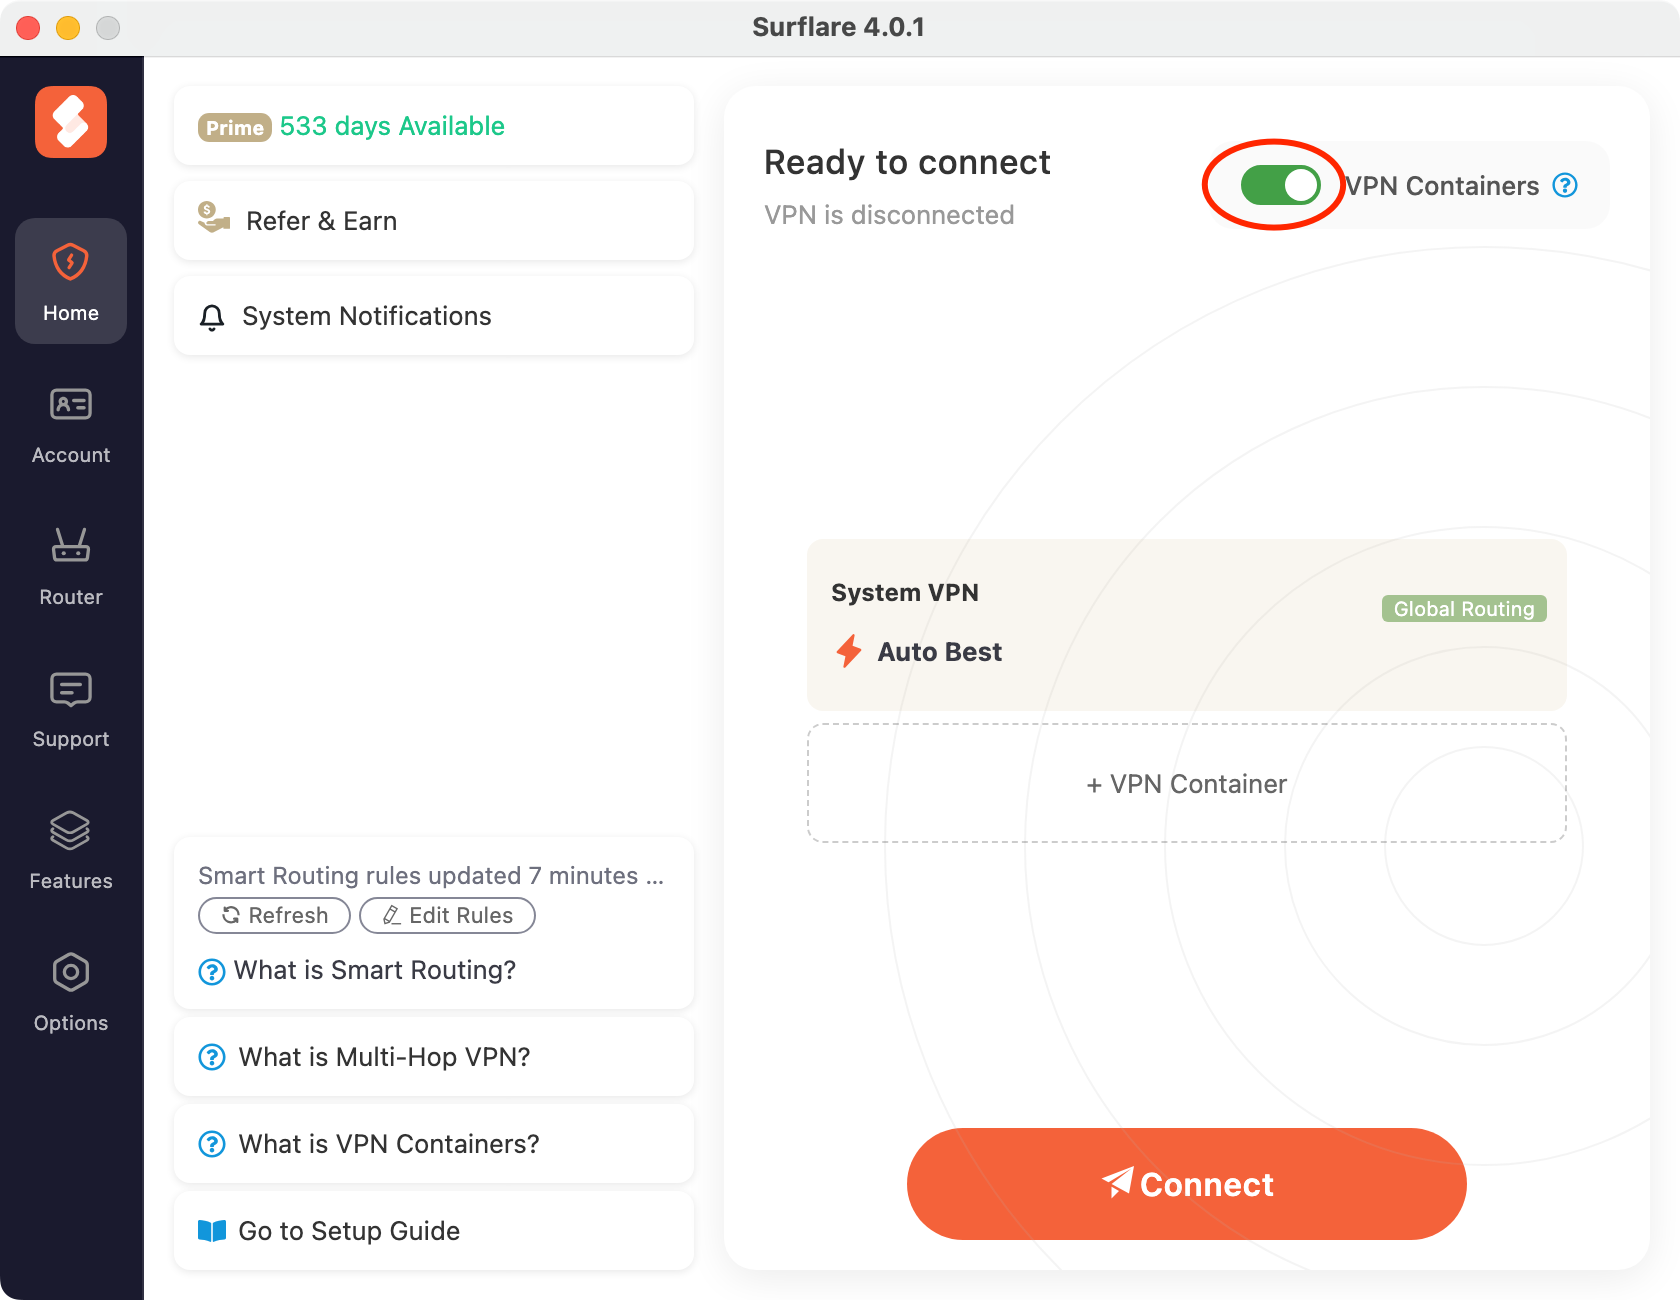
Enable VPN Containers
On the home screen, turn on the VPN Containers toggle to activate this feature.
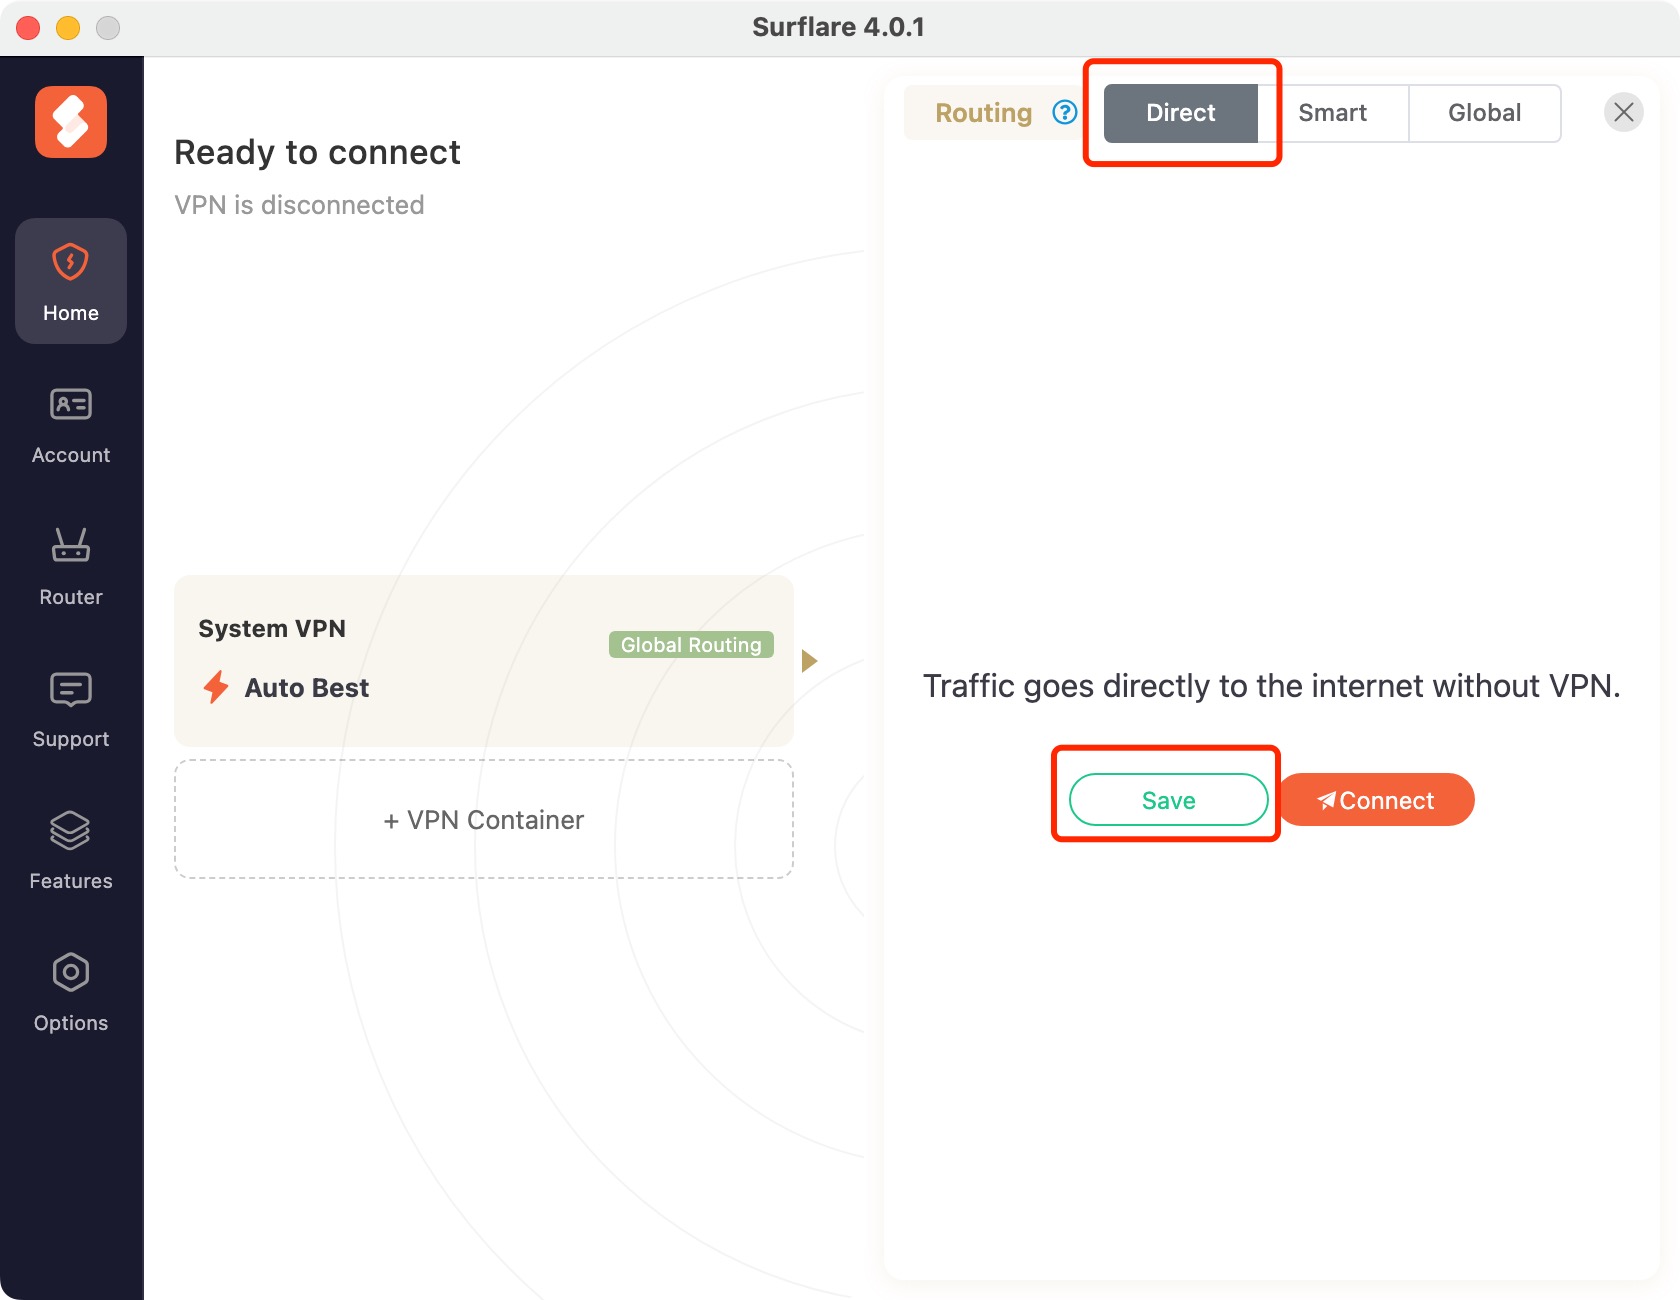
Set Default to Local Internet
Select the System VPN card to open the configuration panel. In the Routing options, choose Direct, then press Save to apply.
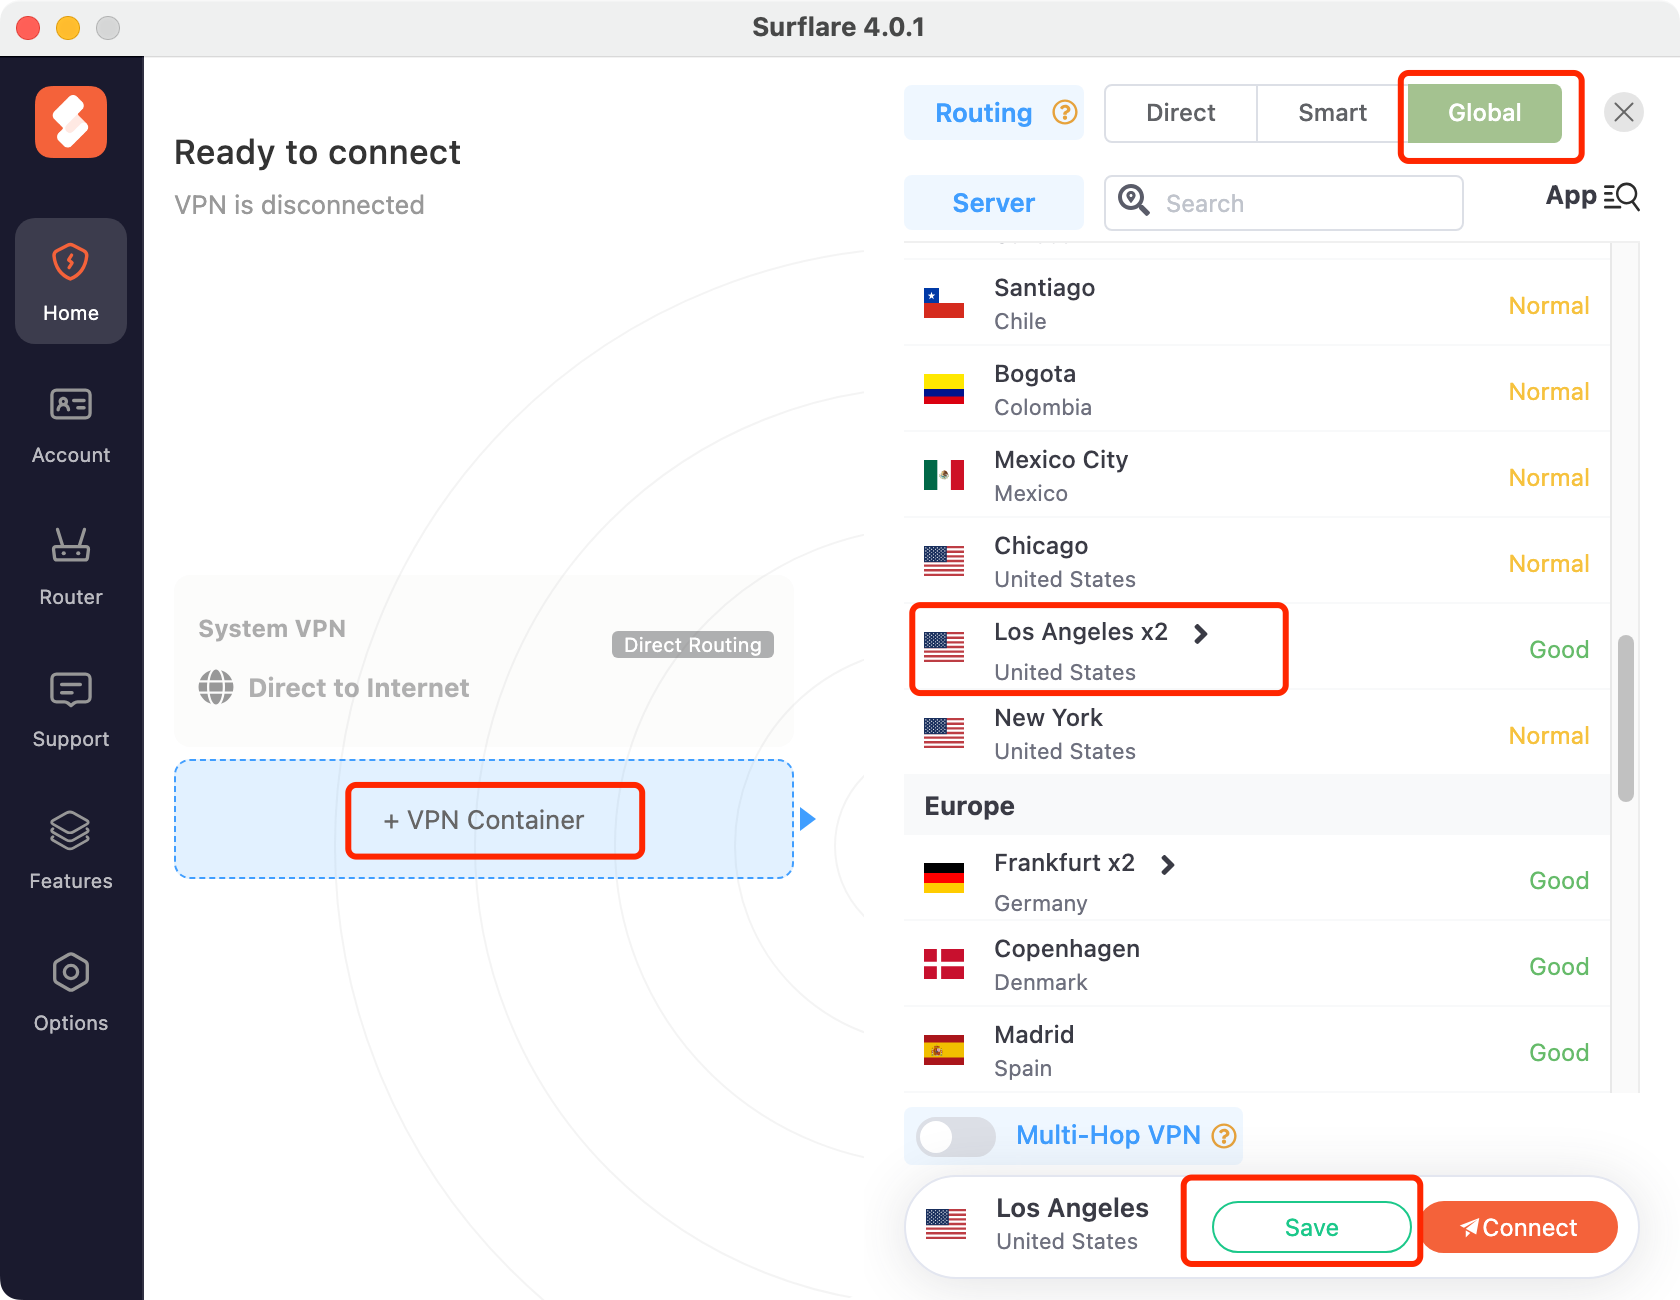
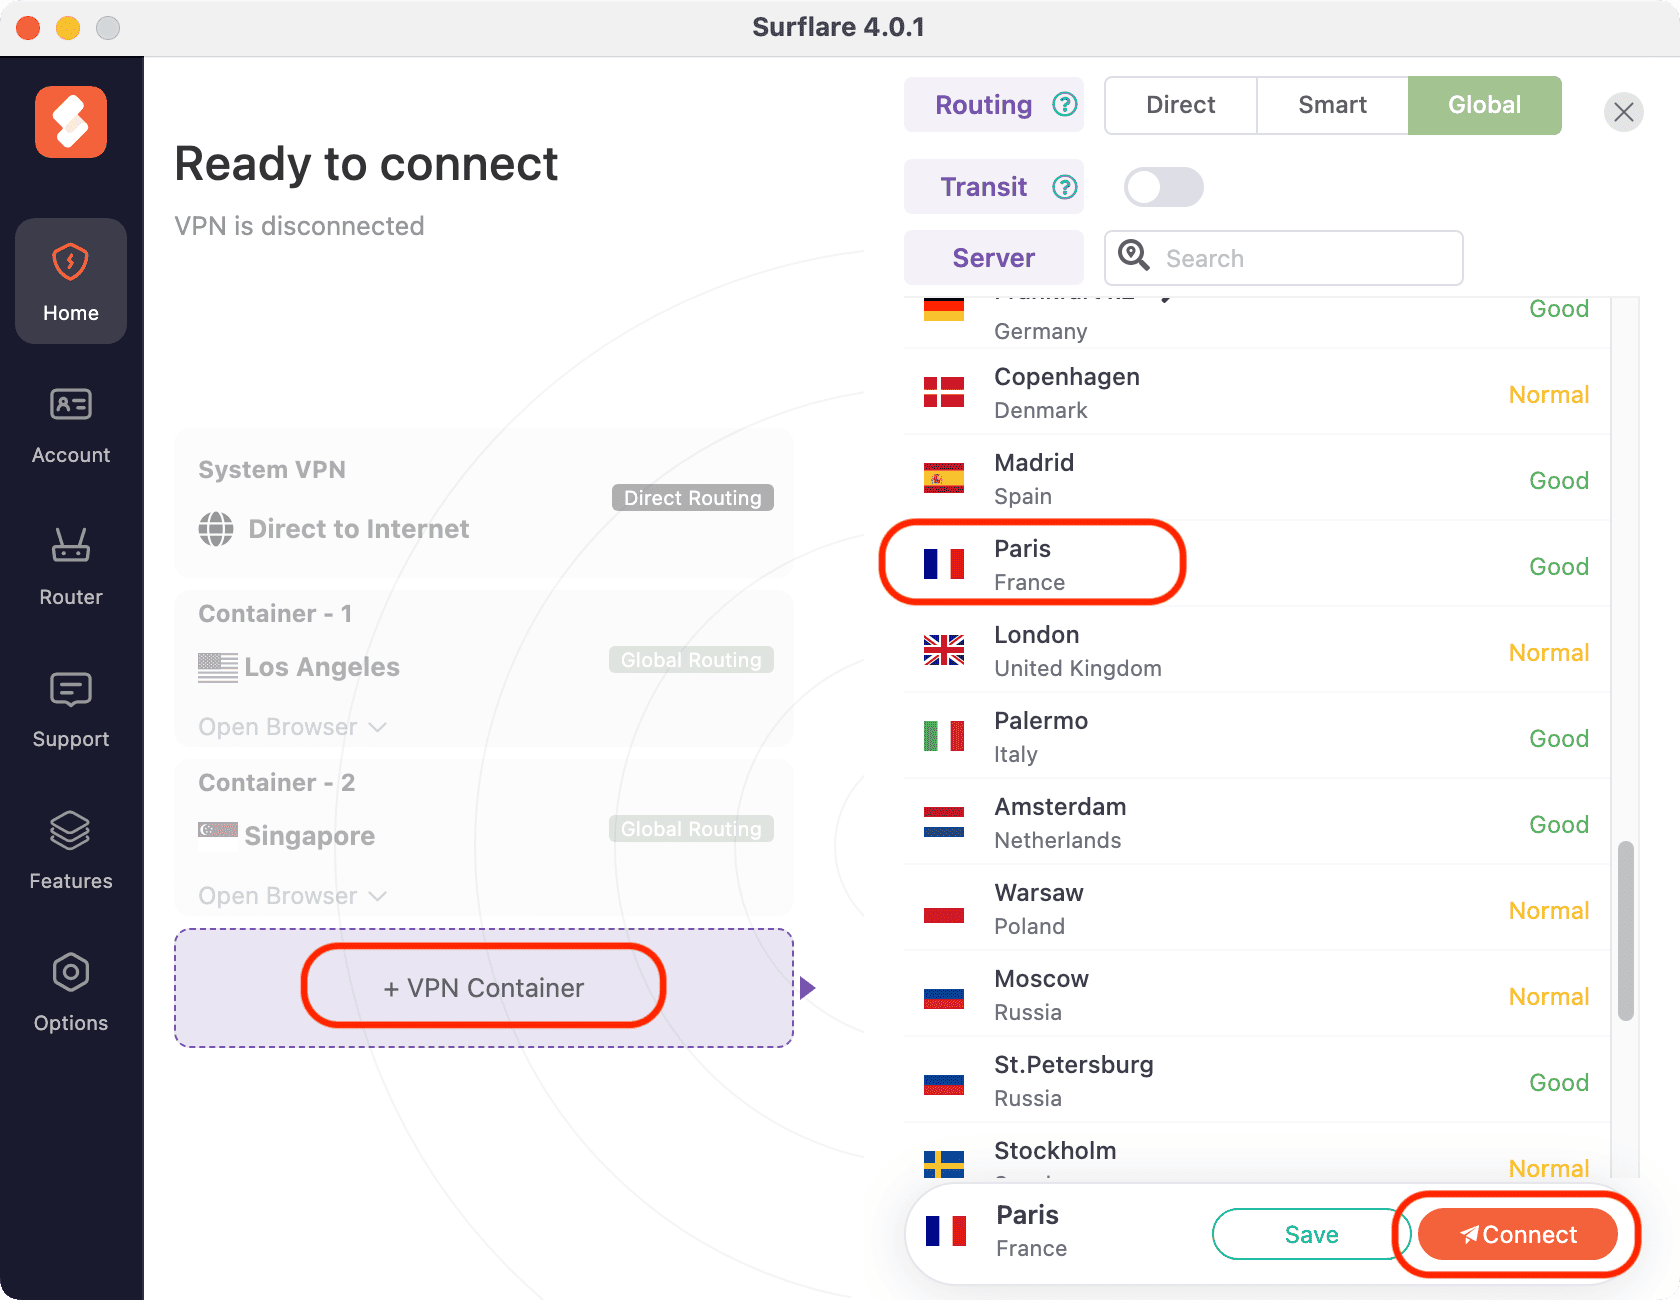
Create containers
Container 1: Press + VPN Container button, set routing to "Global", select Los Angeles (US), then save.
With "Global" routing, all traffic from this container will be routed through the Los Angeles server.
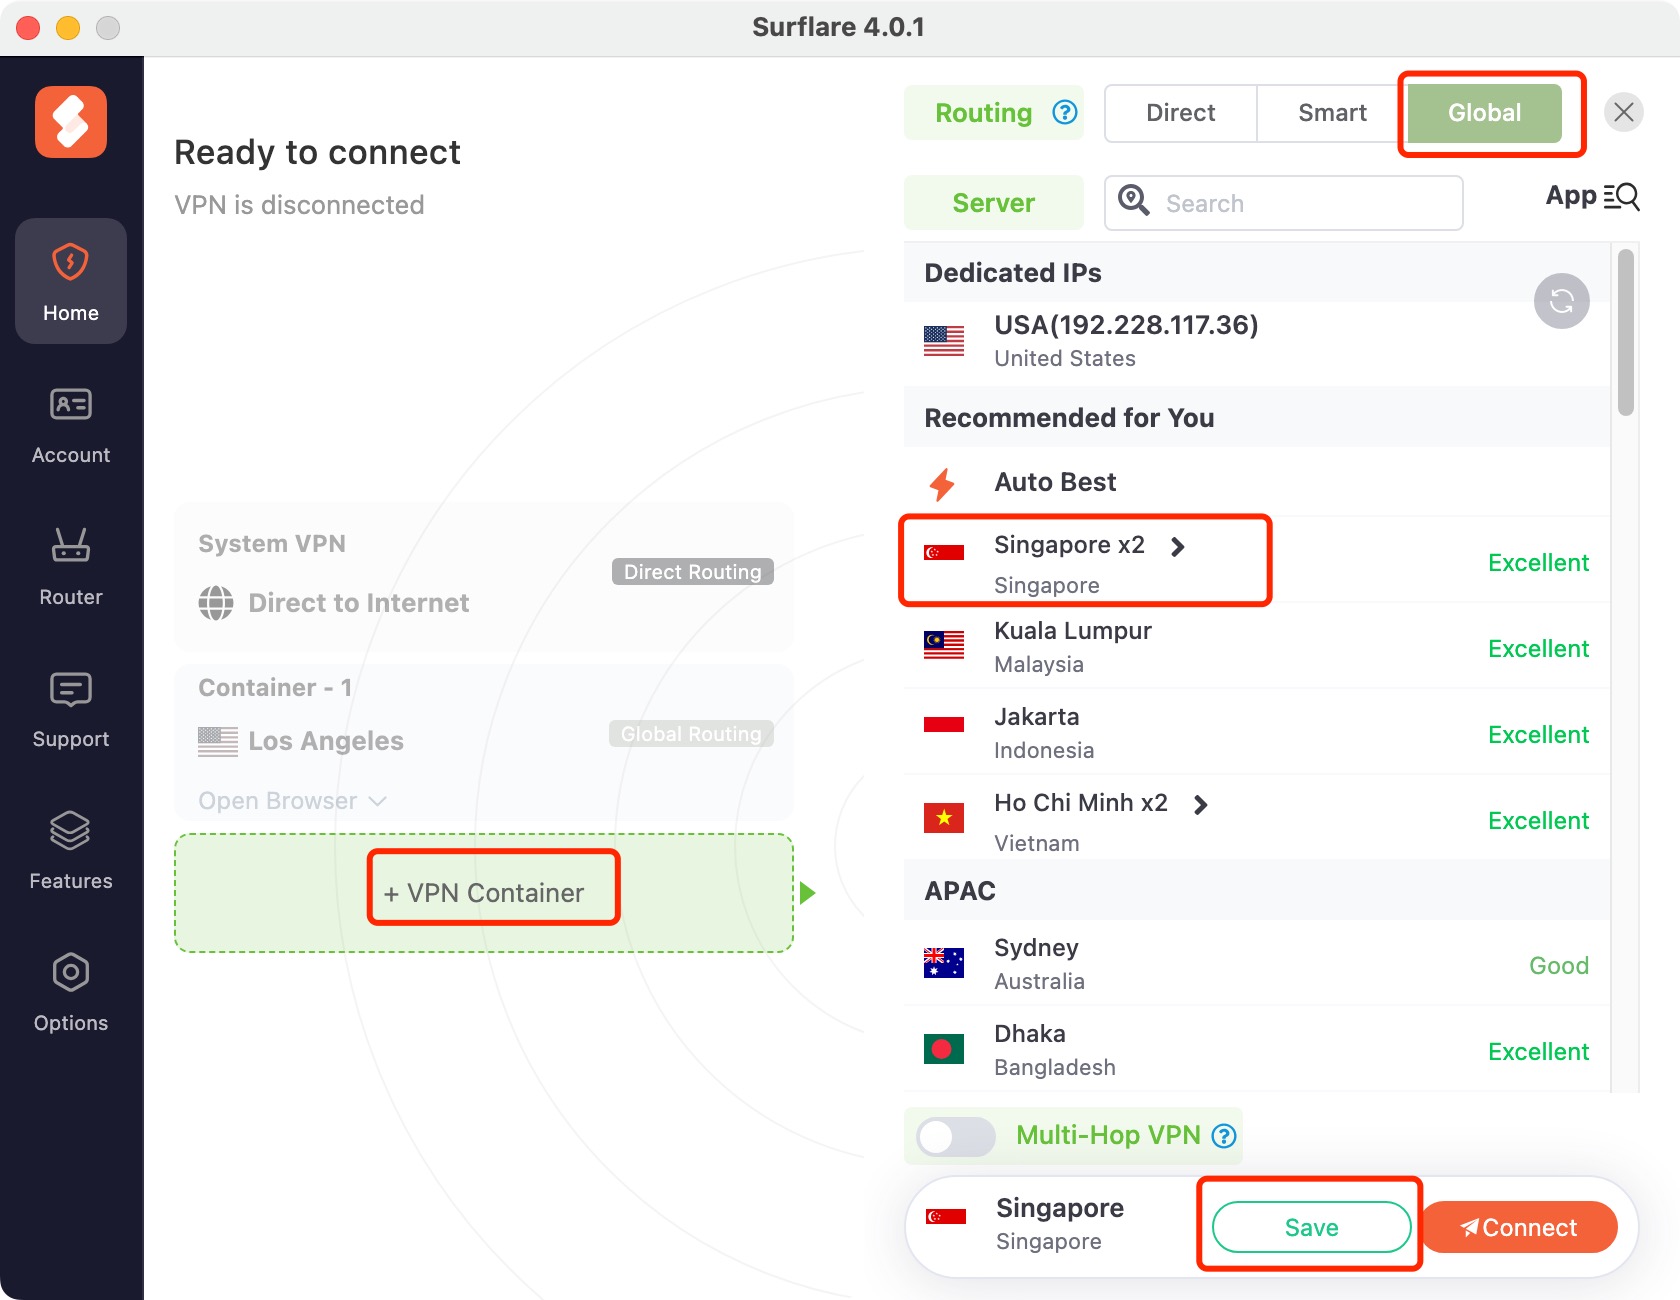
Container 2: Press + VPN Container button, set routing to "Global", select Singapore, then save.
Container 3: Press + VPN Container button, set routing to "Global", select Paris (France), then save.
Open browsers
Once connected, click Open Browser on each container to launch the default browser, or select another browser from the dropdown list.
Each browser will route traffic through its assigned VPN server:
- Container 1: Los Angeles
- Container 2: Singapore
- Container 3: Paris
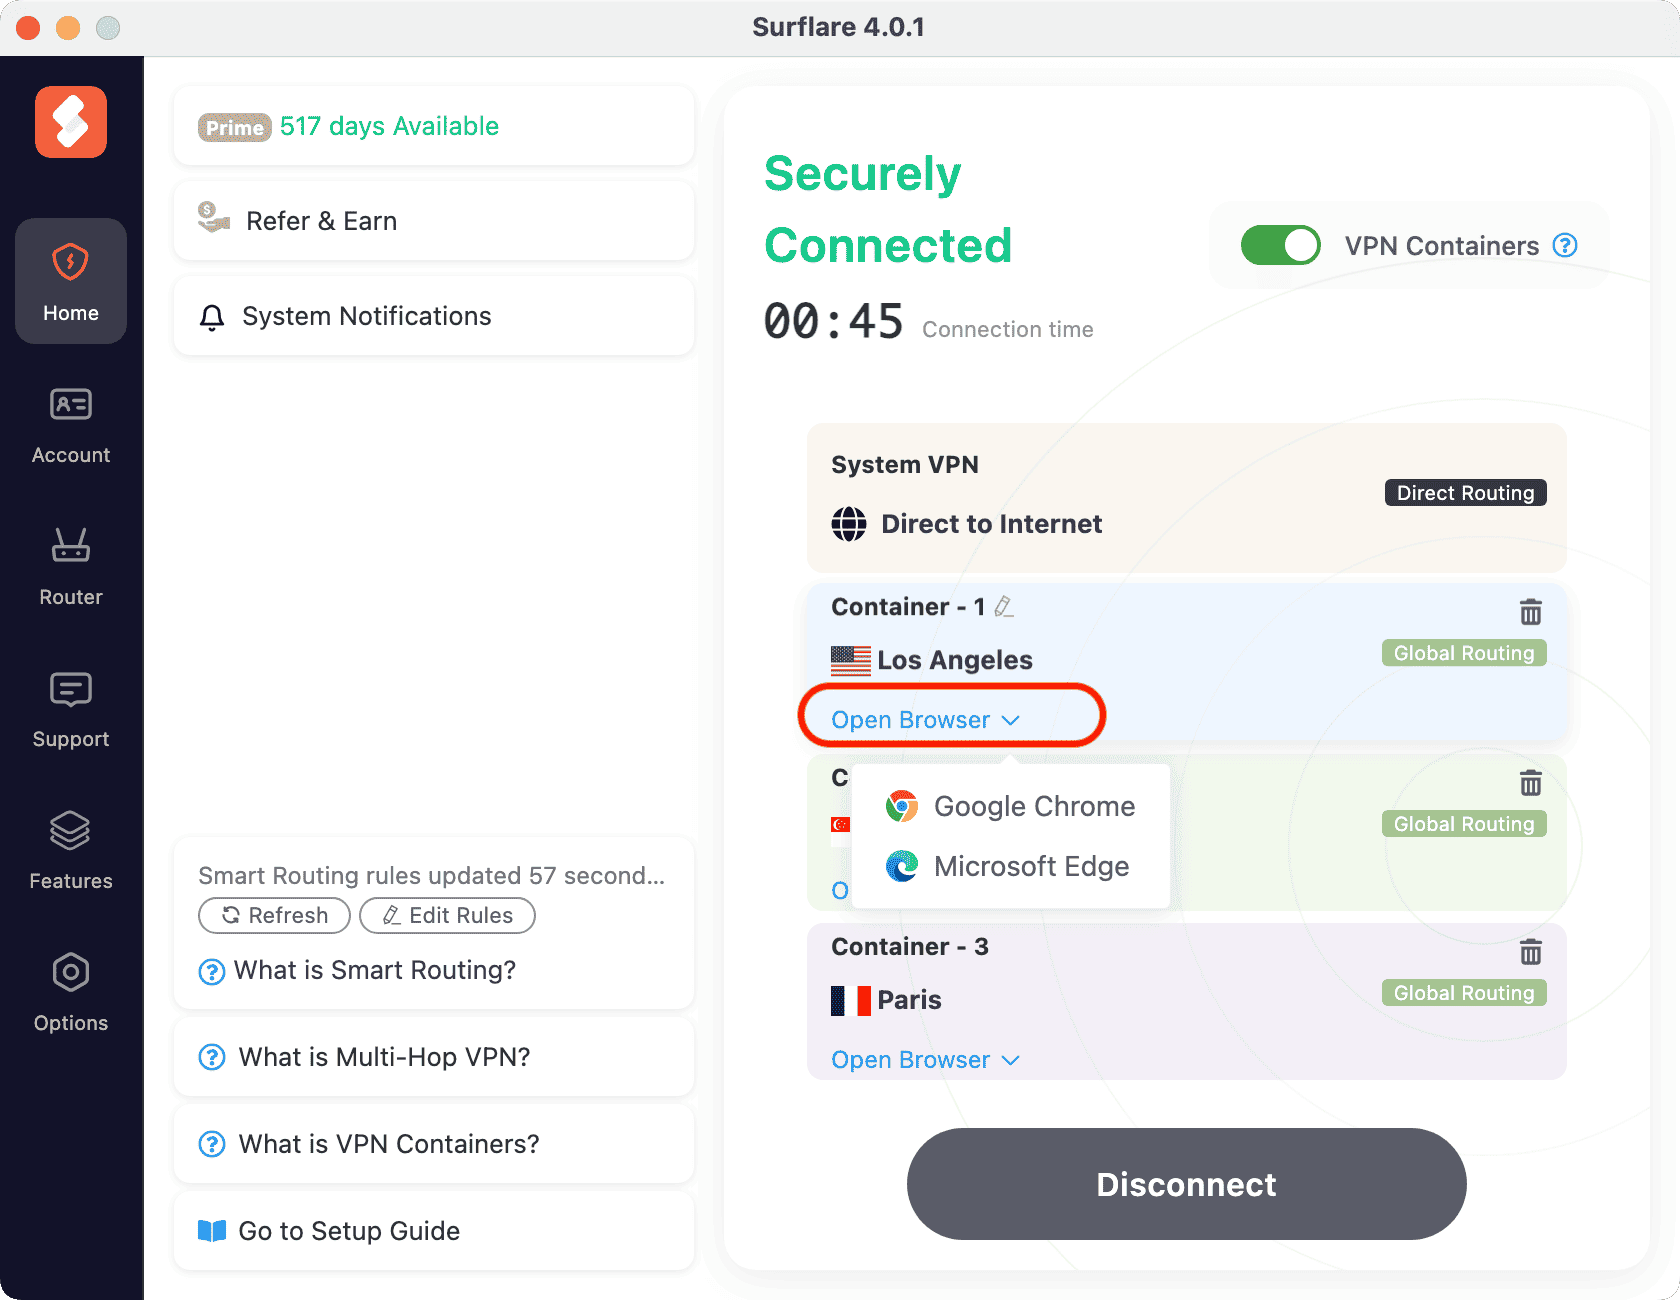
Note: Each container only allows one browser process at a time.
More Instructions
Once connected, you can perform the following operations on each VPN container as needed.

As shown in the image:
If a browser is already open, click the browser icon again to bring it to the front.
Click the × button to close the browser session.
Click the container name to rename it for easier identification.
Click the trash icon to delete a container and close its browser.