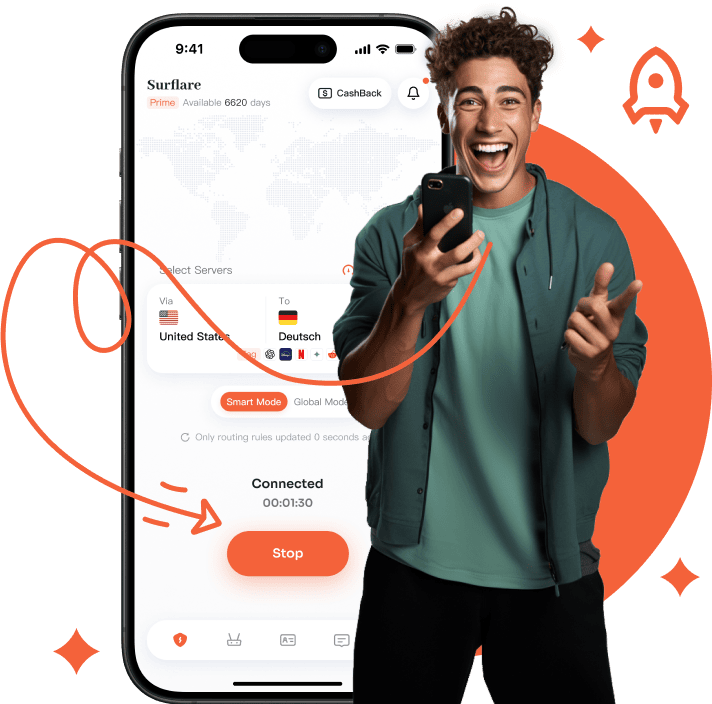
Your Internet. Every Device. Any IP.
 Up to 8 devices and unlimited traffic
Smart Routing & Multi Hop VPN
Multi-IP Browsing
Dedicated Residential IP
24-hour live support
Strong Encryption & Zero Logs
Download now and get a free trial!
Post a review in the App Store to get bonus days!
Amazingly fast !
Surflare uses advanced encryption and encapsulation to disguise data as regular web traffic, bypassing ISP filters and boosting speeds.
With a global network of high-speed dedicated servers, Surflare ensures smooth, lag-free connectivity.

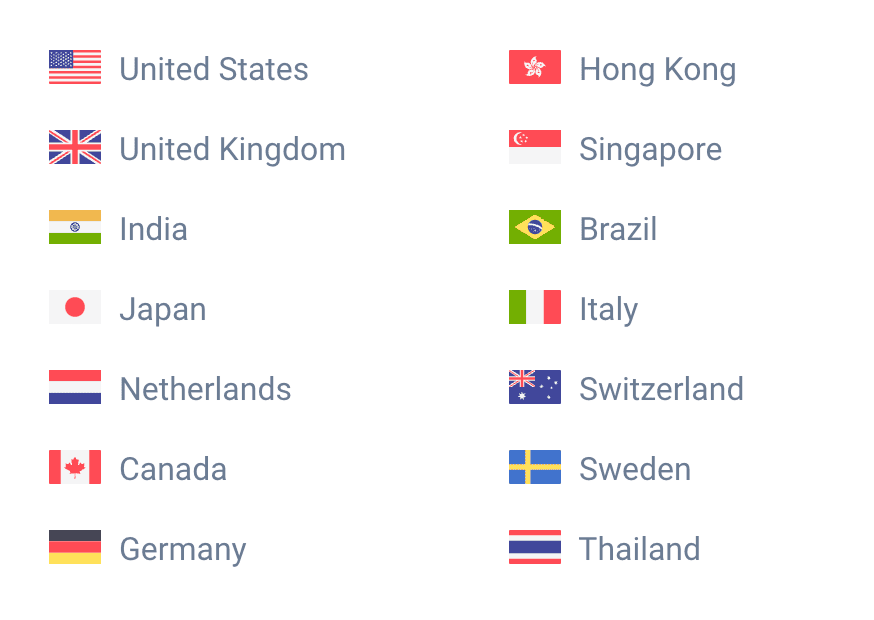
Global Server Network
Ultra-fast servers around the globe across 60+ countries.
Choose from city-level locations and see current availability before you connect.


Works on every platform
Surflare VPN has apps for iOS, Android, Mac, Windows, Linux, browser extensions, and routers.
Use on up to 8 devices Install Surflare VPN on all your devices, and connect up to eight at once.

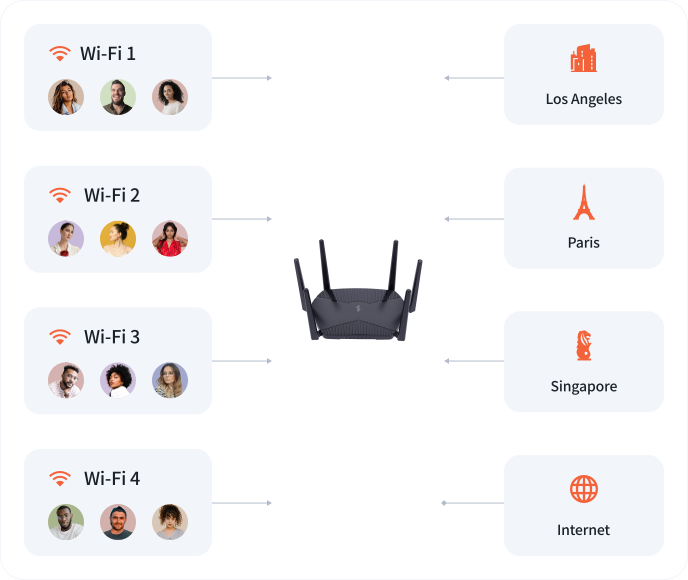
Surflare VPN for Router
Install Surflare on a supported router. Every device on your network is protected.
Easy setup. Install on the router, sign in with your Surflare account, and start using it.
Supports up to 4 LAN subnets, each with its own VPN location. Devices in different subnets can reach the internet from different regions at the same time.
Dedicated IP
Get a fixed, exclusive IP address for enhanced security and reliability.
Available in both Datacenter and Residential IP options, perfect for e-commerce, live streaming, social media operations, and services that require consistent IP.

Transit Server (Multi-Hop VPN)
A Multi-hop VPN can improve speed and reduce latency by optimizing packet routing between servers.
For example, accessing a site in Japan from Canada via a USA-Hong Kong Multi-hop route can be faster due to our premium, optimized links.

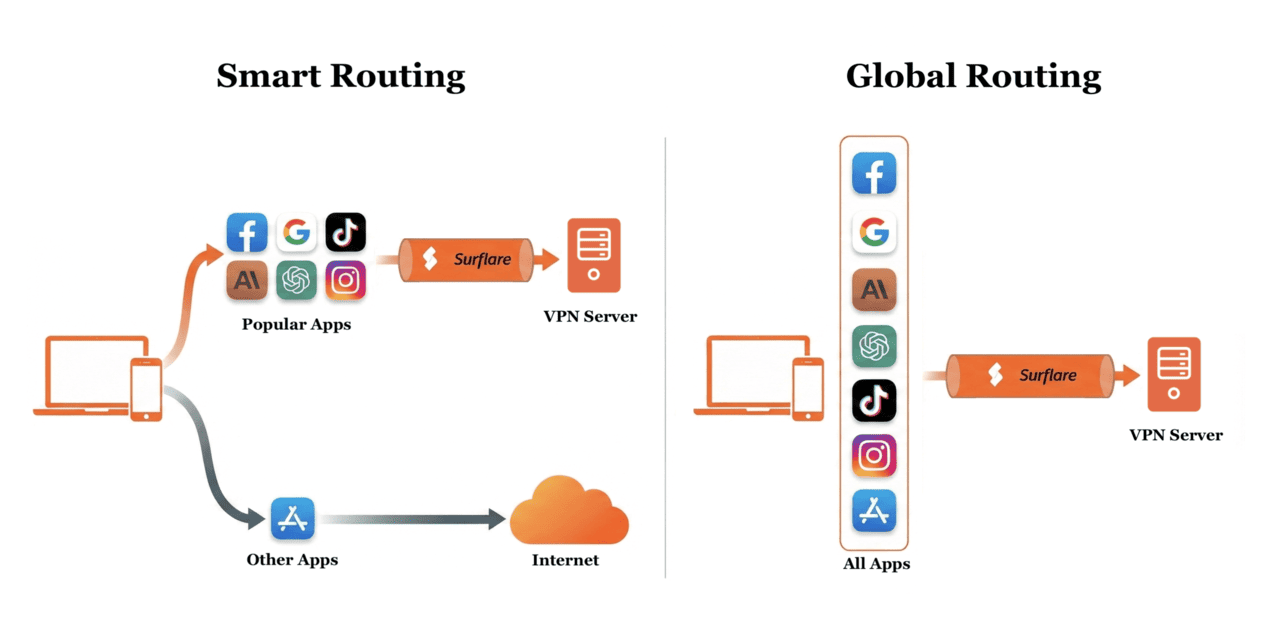
Smart Routing
With Smart Routing, only popular apps go through VPN while others use your local internet directly.
Surflare intelligently identifies over 400+ apps, giving you precise control over how each app connects.
You can also choose Global Routing to route all traffic through VPN.
Multi-IP Browsing
Open multiple isolated browser windows, each connected to a different VPN server.
Use multiple IPs simultaneously on one device, perfect for managing multiple accounts or accessing region-restricted services.

Secure your connection
All traffic is secured with enterprise-grade encryption — trusted by businesses and governments worldwide. Your ISP, mobile carrier, or anyone on the same network sees nothing. What you do online stays between you and your destination.

Protect your privacy
We keep no logs, including no logging of browsing history, traffic destination, data content, or DNS queries.
All VPN connection data — including IP addresses, session info, and browsing activity — is processed in RAM only, never written to disk. Every server restart automatically clears all in-memory records, ensuring nothing persists.

Surflare offers reasonable pricing, with fast, intuitive, and powerful performance.
Starting at just $3.5 per month, with an extra lifetime discount for long-term subscribers.
7 days Money Back Guarantee


We cover the entire world
Ultra-fast servers around the globe across 60+ countries.

24-hour live support
24/7 support, available across every time zone. Whether it's initial setup, a connection issue, or a billing inquiry — reach us via live chat or email and get answers fast.