Buy and Use a Dedicated IP
A dedicated IP gives you a unique, static IP address that only you use. Perfect for e-commerce, streaming, and accessing services that require consistent IP identity.
Subscribe to VPN Plan
Before purchasing a dedicated IP, ensure you have an active Surflare VPN subscription.
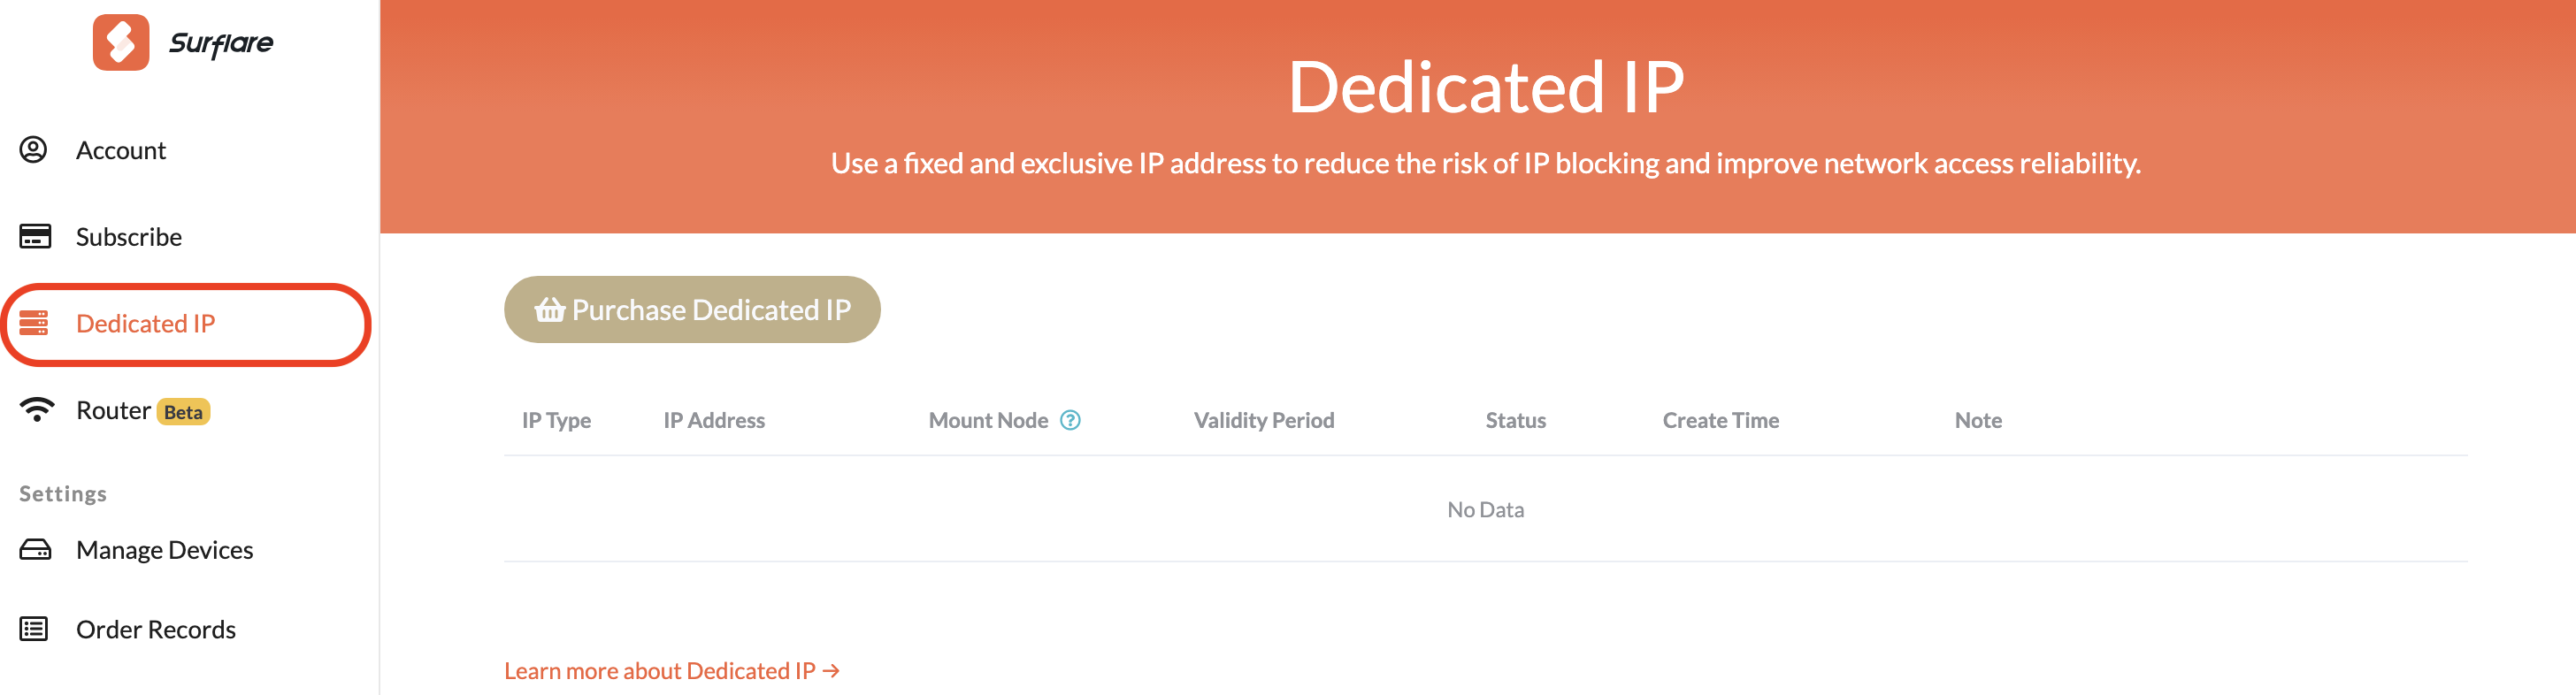
Go to Dedicated IP Page
Log in to your Surflare account and navigate to the Dedicated IP section in your dashboard.
Select IP Type
Choose the type of dedicated IP that fits your needs:
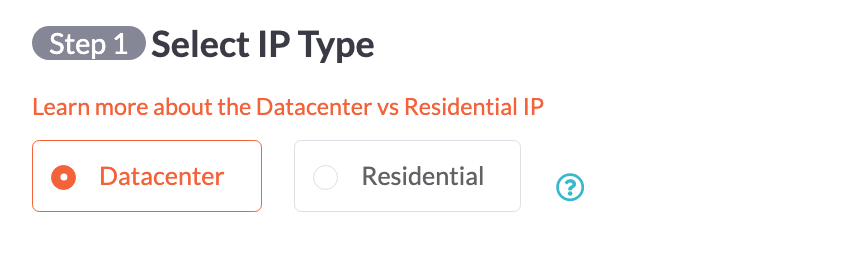
Datacenter IP - Ideal for services requiring a dedicated static IP. More affordable pricing.
Residential IP - Reduces account ban risk on Facebook, TikTok, etc. Better visibility for live streaming and social media. Ideal for e-commerce operations.
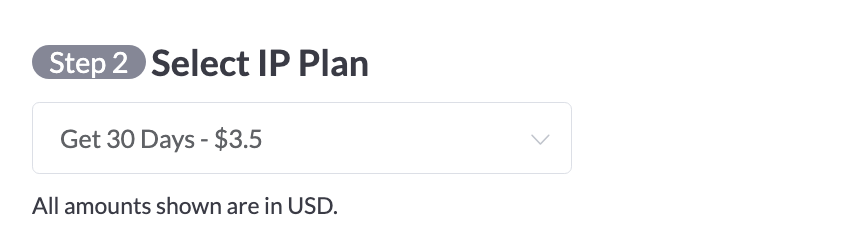
Select Plan Duration
Choose how long you want to keep your dedicated IP. Longer plans offer better value.
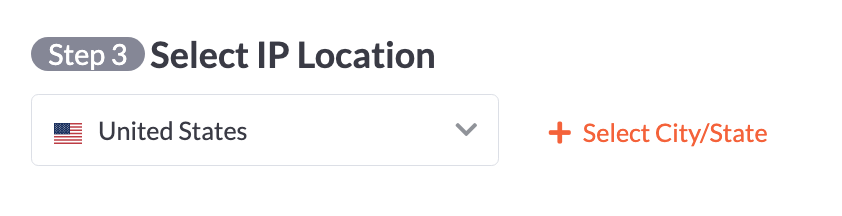
Select IP Location
Choose the country and optionally the city/state for your dedicated IP.
Complete Payment
Review your order and complete the payment. Your dedicated IP will be allocated within 5-30 minutes.

Connect to Your Dedicated IP
Once your dedicated IP is allocated, you can connect to it from any Surflare app.
Open Surflare App
Launch the Surflare VPN app and make sure you are logged in to your account.
Find Your Dedicated IP
Click on the server selector to open the server list. Your dedicated IP will appear in the "Dedicated IP" section at the top.

Connect
Click on your dedicated IP to connect. The app will establish a connection to that specific IP address.
Tips for Using Dedicated IP
Your IP stays the same across all sessions, building trust with online services.
Set a reminder to renew before expiration to keep your IP.
Your dedicated IP is for your exclusive use. Don't share credentials.